In recent years, we have experienced that periods of excessive rainfall are often followed by severe droughts. Certainly, many of us have come to the conclusion: let us not lose the results of autumn and spring gardening and we are not going to let the drought destroy our crops. With advice from the gardeners of Krishna Valley, I started to buy the required elements and set up our own drip irrigation system.
With this short writing and some pictures, I would like to make it easier for you, dear readers to set up your own micro-irrigation system.
The first phase of setting up the irrigation system is planning. Draw your bed system and plan where the main and secondary pipes are to be laid. The system can be operated from a network, and if you choose gravitation as an operating tool in the system, then the level of difference between the tank and the vegetable garden should be 2-3 meters.
Once we have experience on how much time it takes to moisten the soil properly, we can run the irrigation system just by opening and closing the water tap. This irrigation method is absolutely water saving and more suitable for plants than a sprinkling irrigation system or using watering cans. If our plants reach a height of 10-15 cm, then add mulch onto the beds and cover the pipe as well, so that the system becomes even more efficient and water saving.
For a small size garden we need a pipeline system of appropriate diameter (this makes the backbone of the system), terminals, taps and drip tapes, and even T-profiles and filters. Usually you can also purchase the parts for connecting the system to the garden tap in the same place you buy the elements for the whole drip irrigation system.
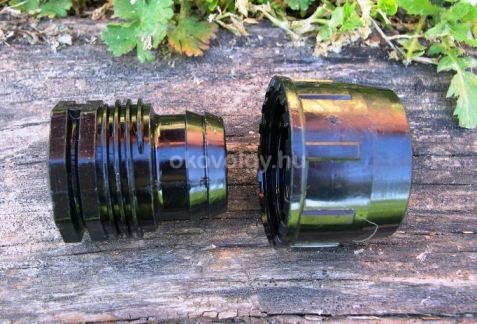
A terminal taken into pieces …

… and fitted at the end of a pipe
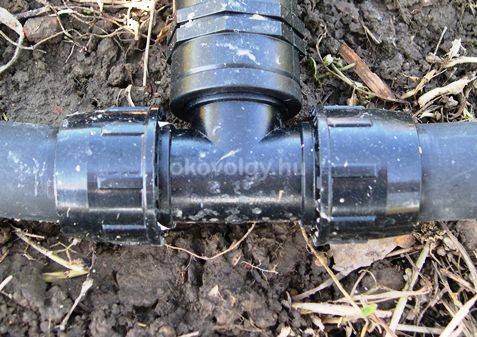
The T-profile that makes it possible to branch the main pipe
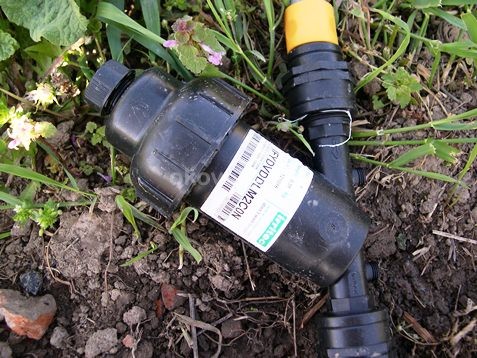
If you irrigate from a tank or water with rainwater, make sure to insert a filter in the system, otherwise small dirt will quickly clog the drip tapes
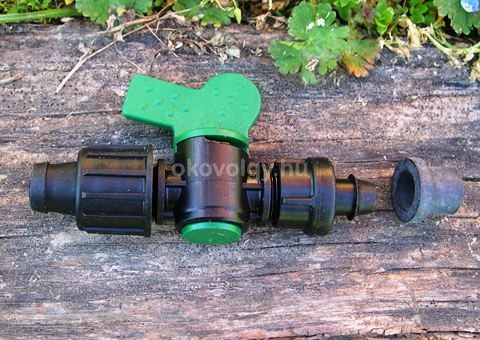
The taps are mounted to the main pipe by making holes in the trunk with a 15 mm diameter drill, then inserting a rubber gasket into each hole (see on the right) and then inserting the taps into them
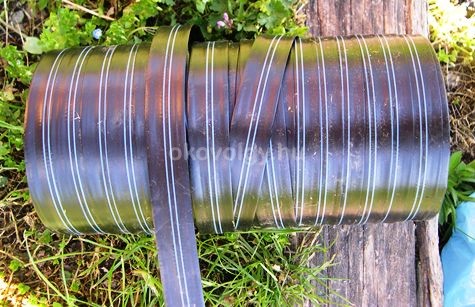
The drip tapes in a roll …
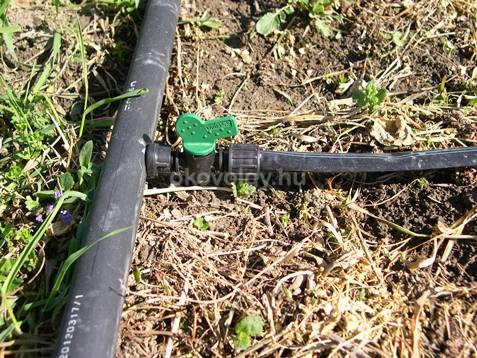
… and fitted to the taps mounted into the main pipe
The tip of the drip tape can easily be secured by folding it several times and then fastening a cut of 4-5 cm piece at the end of it.
It is important to place the drip tapes on the ground with the blue strips up. Always disassemble the system in winter and preferably store it in a dry place. According to our experience the tapes last for 2-3 seasons, then they need to be replaced, and the other elements – if we see to them properly – will remain functional even for several decades.
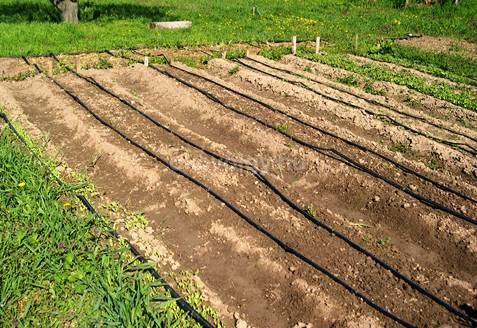
An already up and running system in our garden
Mounting the components is an extremely easy and quick process, it can even make a pleasant, few hour-long family event. The result of it is very spectacular and infinitely useful.
András Kun